I had a request recently to monitor RDP connections, not just that the service was running but that the system was accepting new RDP sessions. I had to give it some thought. What would be the easiest way to monitor this? I figured why not just simulate a connection attempt? We can do this pretty easy in WhatsUp® Gold. The not so frequently used TCP/IP monitor is more than just seeing if a port is open/closed. You can also send data, receive data, and verify the received data is correct. So how do we send the data properly? Well, first we need to start up Wireshark and begin listening. Wireshark is freely available and can be downloaded here.
Note: Sorry this isn’t quite step-by-step yet but hopefully the screenshots get the point across. I will update with step-by-step instructions when I have time to do so..
Once you have it downloaded, run the program and begin capturing. While you are capturing, perform your operation. In our example here, we are going to go to Start > Run > mstsc > OK. We will RDP to any system that accepts a connection and wait for it to prompt for our credentials. We can then stop our Wireshark capture. We know RDP is going to use port 3389 TCP/UDP, so let’s apply a filter in Wireshark for that. In the filter textbox for Wireshark, type tcp.port == 3389.

Once we find the start of the conversation between the two systems, we will right-click and select Follow > TCP Stream (or Ctrl+Alt+Shift+T) as seen below.

After you start following the TCP Stream, you will get a secondary window as seen below. In my example here Red = Sent, Blue = Received. You’ll need to switch the ‘Show and save data as’ to ‘C Arrays’. WhatsUp® Gold understands and translates these for us. Copy the first two arrays, separated by the /* Packet */ indicators. Remember, red is what we’re sending and blue is what we’re receiving back.

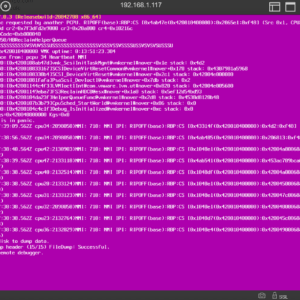
I am copying the first packet sent with data here.
Once you copy both sent and received data, you are going to paste it into Notepad or whichever text editor you prefer. Use Edit -> Replace. Find what: 0x Replace with: \x


Next, find “, ” (comma then space) and replace with nothing. Lastly fix the formatting as need be so everything is nice a cozy together.
And now I end up with this in my WUG TCP/IP monitor:
TCP, Port 3389
Send=\x03\x00\x00\x13\x0e\xe0\x00\x00\x00\x00\x00\x01\x00\x08\x00\x03\x00\x00\x00
 Expect=\x03\x00\x00\x13\x0e\xd0\x00\x00\x124\x00\x02\x08\x00\x02\x00\x00\x00
We can now effectively simulate a RDP connection to that system and verify the system is accepting RDP connections this way! I also recently followed similar steps to test LDAP connections to AIX systems. Using a nice freeware application for Windows: http://www.ldapadmin.org/ I was able to simulate my connection to the LDAP system, specifying credentials, listen with Wireshark, and then use the info in the WUG TCP/IP monitor just as I did with the RDP simulation shown above. WhatsUp® Gold really is limitless…